[Zabbix] Zabbix-server (frontend) 5.0.0 version 소스 설치
======================================================================
설치 환경
OS : CentOS7
Apache : Apache/2.4.7 (Unix)
Php : PHP 7.2.5 (cli)
Mysql : 5.7.10, for Linux (x86_64)
========================================================================
그룹 추가
# groupadd --system zabbix
# useradd --system -g zabbix -d /usr/lib/zabbix -s /sbin/nologin -c "Zabbix Monitoring System" zabbix
zabbix 설치파일 다운로드
# wget https://cdn.zabbix.com/zabbix/sources/stable/5.0/zabbix-5.0.0.tar.gz
다운로드 url : https://cdn.zabbix.com
Zabbix Cloud Images and Appliances
cdn.zabbix.com
# tar xvfz zabbix-5.0.0.tar.gz
# cd zabbix-5.0.0
# ./configure --prefix=/usr/local/zabbix/ --enable-server --enable-agent --with-mysql --enable-ipv6 --with-net-snmp=/usr/bin/net-snmp-config --with-libcurl
===================================================================================
error 발생 시, 특정 모듈이 없어서 error 나는 것이니 설치해주면 됨.
snmp not found error
# yum install -y net-snmp net-snmp-devel
libevent not found error
# yum install -y libevent-devel
====================================================================================
컴파일이 성공적으로 완료되었으면 make 진행
# make
# make install
데이터베이스 계정추가 및 데이터베이스 밀어넣기
# mysql -uroot -p
mysql > create database zabbix character set utf8 collate utf8_general_ci;
mysql > create database zabbix character set utf8 collate utf8_bin;
mysql > grant all privileges on zabbix.* to 'zabbix'@'localhost' identified by 'password12!@';
mysql > grant all privileges on zabbix.* to 'zabbix'@'%' identified by 'password12!@';
mysql > flush privileges;
mysql > exit
# cd /usr/local/src/zabbix-5.0.0/database
# mysql -uroot -p zabbix < schema.sql
# mysql -uroot -p zabbix < images.sql
# mysql -uroot -p zabbix < data.sql
Apache 설정 및 웹소스 복사
# mkdir -p /home/zabbix/public_html
# cp -arp /usr/local/src/zabbix-5.0.0/ui/* /home/zabbix/public_html
Apache 설정 (vhost설정, document permission 설정)
# vi /usr/local/apache/conf/httpd.conf
<Directory "/home/zabbix/public_html">
AllowOverride all
Options all
Require all granted
</Directory>
<VirtualHost *:80>
DocumentRoot "/home/zabbix/public_html"
ServerName 115.68.x.x
ErrorLog "logs/115.68.x.x-error_log"
CustomLog "logs/x.x.x.x-access_log" common
</VirtualHost>
Apache 재시작
# /etc/init.d/apachectl restart
zabbix server 설정
# vi /usr/local/zabbix/etc/zabbix_server.conf
DBHost=localhost
DBName=zabbix
DBUser=zabbix
DBPassword=password12!@
DBSocket=/tmp/mysql.sock
zabbix 실행
# /usr/local/zabbix/sbin/zabbix_server -c /usr/local/zabbix/etc/zabbix_server.conf
아래와 같은 에러 발생 시 하단 링크를 참조하여 해결
/usr/local/zabbix/sbin/zabbix_server: error while loading shared libraries: libmysqlclient.so.20: cannot open shared object file: No such file or directory
[error] error while loading shared libraries: libmysqlclient.so.20: cannot open shared object file: No such file or directory
자빅스 소스 설치 중, 특정 라이브러리 로딩 중 에러가 발생하였다는 메시지가 발생하였다. /usr/local/zabbix/sbin/zabbix_server: error while loading shared libraries: libmysqlclient.so.20: cannot open shared object file: No s
juu98.tistory.com
만약 방화벽 사용 시 10051 tcp/udp 포트 등록해주어야함
정상적으로 zabbix가 실행되었으면 vhost에 등록한 도메인을 통해 zabbix_admin 페이지 접속
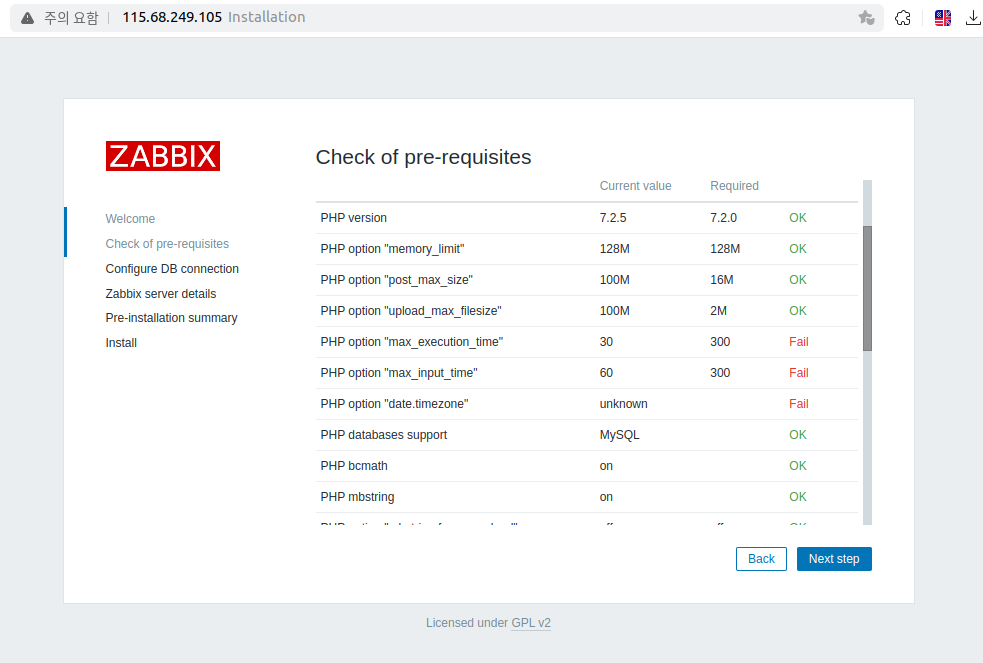
요구사항에 적합하지 않은 부분 확인 후 설정값을 맞춰줍니다.
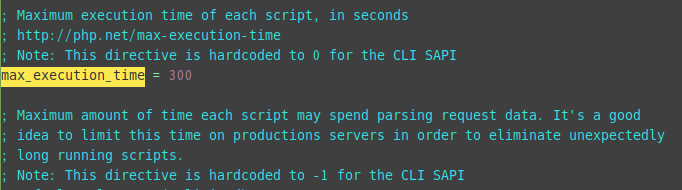
# vi /usr/local/apache/conf/php.ini (php.ini 파일은 php를 어떤 방식으로 설치했는지에 따라 위치가 다를 수 있음. 만약 해당 위치에 없으면 find 명령어로 위치 확인 후 그곳에다 설정해주면 됨)
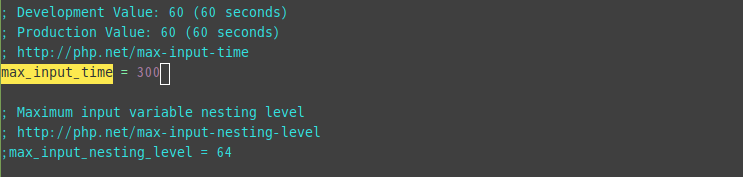
max_exeution_time 30 -> 300으로 변경
max_input_time 60 -> 300으로 변경
date.timezone = Asia/Seoul 로 변경

설정 변경 후 적용을 위해 apache 재시작 혹은 graceful
# /etc/init.d/apachectl graceful
retstart와 graceful의 차이점은 아래 링크 참고
Apache restart와 graceful의 차이점
restart - stop 후 start 하는것과 동일한 명령어 - apache의 모든 프로세스를 종료시키고 재시작 - 서비스 단절 현상 발생 graceful - 접속된 connection 유지하면서 apache 모든 프로세스를 종료하고 재시작
juu98.tistory.com
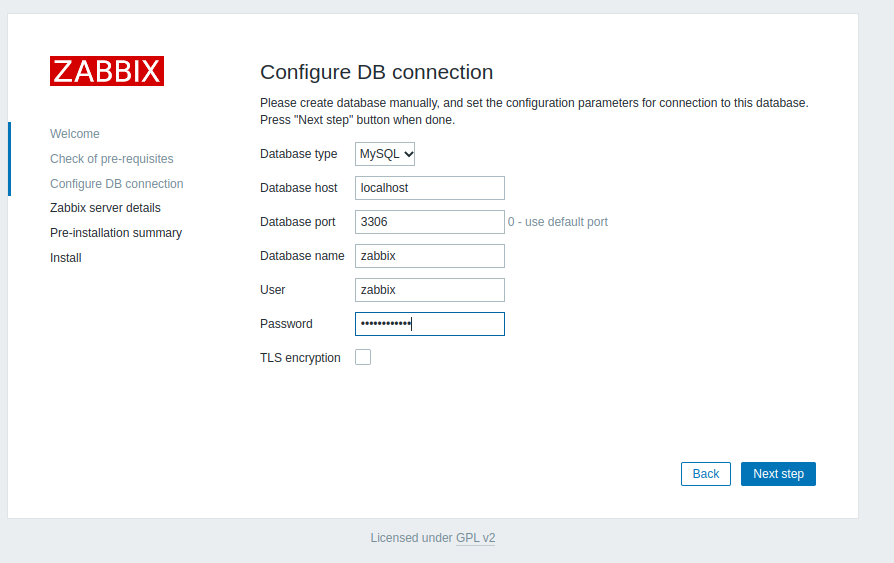
Mysql 설치 시 생성하였던 zabbix에 대한 정보들 작성
/usr/local/zabbix/etc/zabbix_server.conf 해당 설정파일에 작성했던 내용과 동일한 내용으로 설정해주면 됨
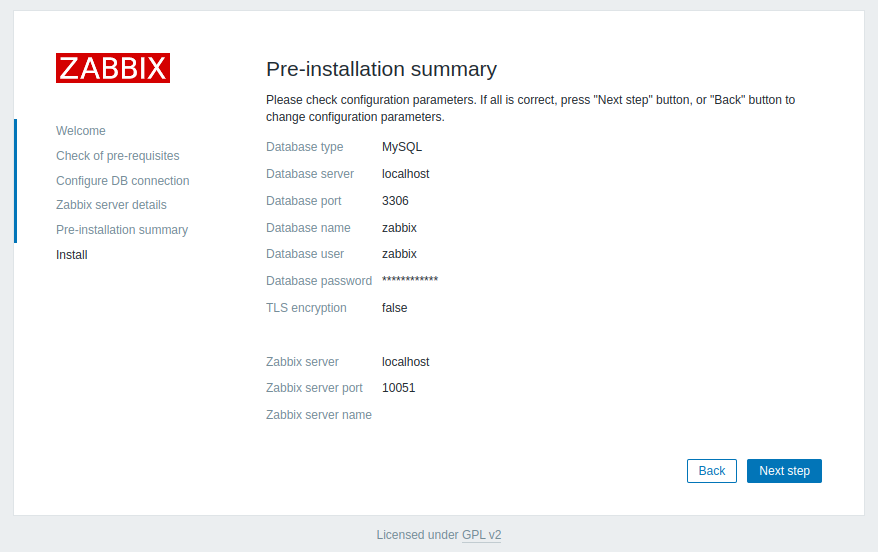
설정한 내용이 맞는지 확인 후 next step
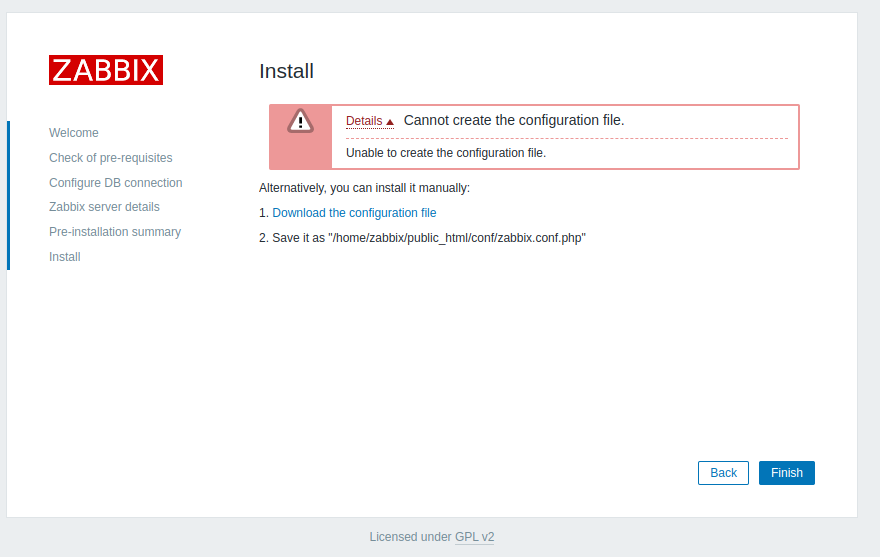
설정파일이 적용되지 않았다는 메시지가 뜰 경우 하단에 나와있는 메뉴얼대로 진행하면 됨.
Download the configuration file 을 클릭하여 zabbix.conf.php 파일 다운로드
다운로드 한 파일을 /home/zabbix/public_html/conf/zabbix.conf.php 경로로 옮겨주면 끝
완료되었으면 Finish 버튼 클릭
성공적으로 frontend 설정이 완료되었다는 메시지가 뜬다.

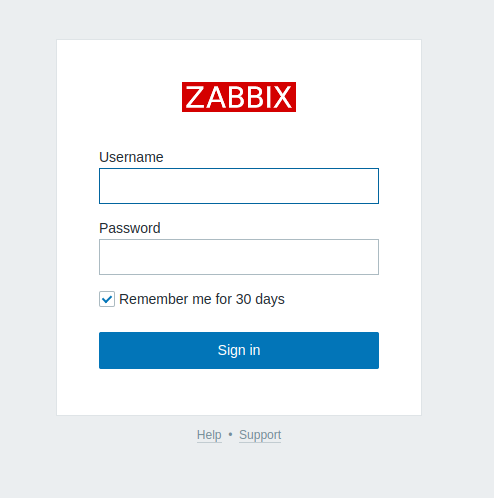
초기 접속정보
Username : adimin
Password : zabbix
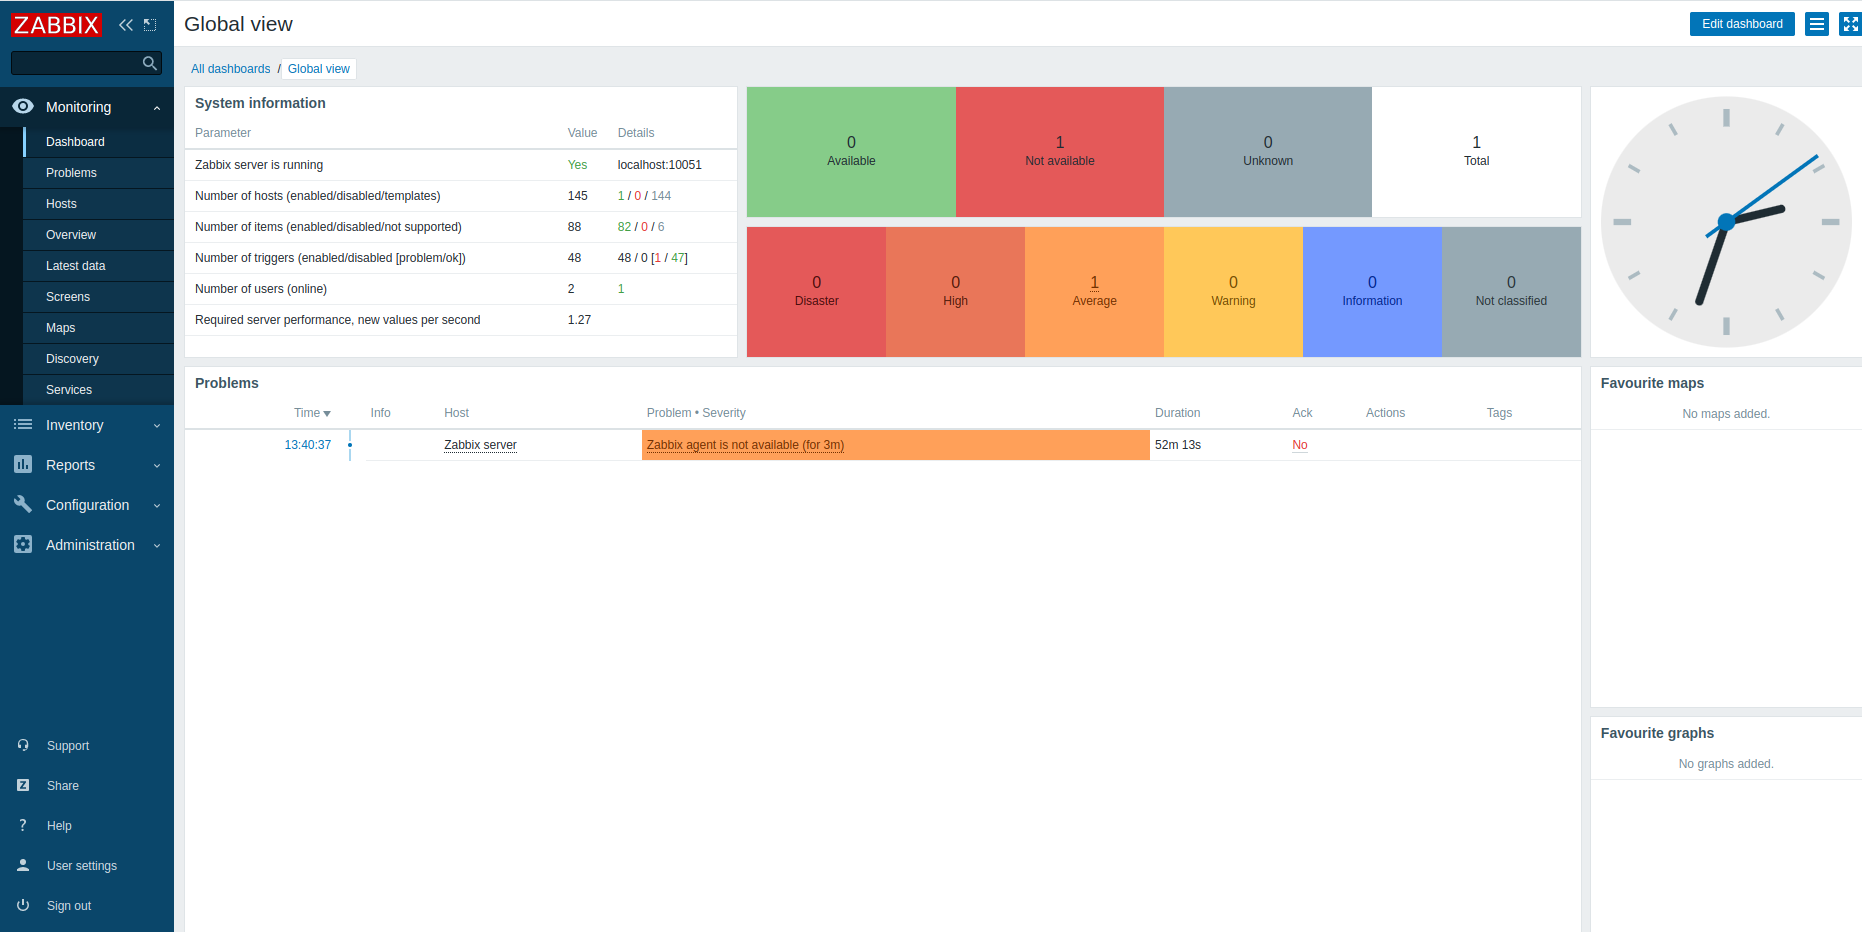
정상적으로 로그인되면 아래와 같이 zabbix monitoring 페이지가 뜬다.